
Demystifying the Process: How to Self-Host a WordPress Site
Empowering Your Website: The Ultimate Guide to Self-Hosting a WordPress Site
Introduction
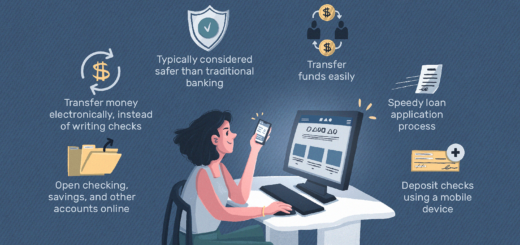
Managing a website is no longer a job that requires professional web designers. The rise of content management systems (CMS) has democratized website building, allowing anyone with basic computer skills to create and publish their own site. WordPress is one of the most popular CMS options available, and it offers two ways to build your site: self-hosting or using a hosted platform.
Explanation of what self-hosting a WordPress site means
Self-hosting means that you are responsible for purchasing web hosting and installing WordPress on that server yourself. This allows you complete control over your website, from the backend server configuration to the frontend design. Self-hosting also gives you complete ownership of your content and data, which is essential if you want to grow your online presence over time.
Benefits of self-hosting versus using a hosted platform
Using a hosted platform like WordPress.com or Squarespace can be an attractive option for beginners because it’s easy and straightforward to set up. However, these platforms come with certain limitations, such as restrictions on plugins and themes you can use, limited control over your site’s codebase, branded domain names, etc.
On the other hand, self-hosted websites give you complete flexibility in customizing your site’s look & feel by using various plugins and themes options available in the market. You also get full access to all files stored on your server which makes customization more convenient compared to hosted platforms where changes may be limited by proprietary software configurations.
With self-hosted websites there’s no need for ads; you can monetize through partnerships which isn’t possible on free hosted websites. Additionally, you will have full ownership rights over all data associated with your website which can be especially valuable if building any business around it.
While hosted platforms are ideal for beginners who want an easy solution without much technical knowledge, self-hosting a WordPress site offers the flexibility and control to truly make your website your own. With the right tools and knowledge, self-hosting can be a rewarding and empowering experience that gives you complete ownership over your online presence.
Choosing a Hosting Provider
Choosing the right hosting provider for your WordPress site is critical to its success. There are several factors you should consider when selecting a hosting provider, including uptime, speed, security, support, scalability, and pricing.
Factors to consider when choosing a hosting provider
When selecting a hosting provider for your self-hosted WordPress site, you should consider the following:
- Uptime: your website needs to be available 24/7/365 so ensure that the hosting provider guarantees high uptime.
- Speed: a fast loading website is essential for user experience and seo.
- Security: Verify that the hosting provider implements adequate security measures like SSL certificates and firewalls to protect your site against cyber threats.
- Tech Support: Having reliable technical support can mean the difference between a minor inconvenience or an outright catastrophe when technical issues arise. Choose providers with great customer service reviews.
- Pricing:The cost of the web host is also an important consideration. Consider features such as price-lock guarantee or promotional rates when reviewing pricing options
Narrowing down on the best fit: Popular Hosting Providers and their Features
The following are some popular WordPress hosting providers and what they offer:
Bluehost
- – Free domain name registration with each plan
- – One-click WordPress installation
- – Good uptime and average page loading speed
SiteGround
- – Top-rated 24/7 customer support
- – Multiple data center locations for faster site speed
- – SSL certificate and daily backups included
A2 Hosting
- – High-speed performance with Turbo servers that loads up to 20x faster than other hosts
- – Free SSL certificate and SSD storage for fast data access
- – HackScan security scans your site daily to prevent hacking attacks.
The features above are just a few examples, but each hosting provider has its own unique offering. You can research the details of each provider’s hosting packages before making the final decision. Comparing these factors will help you select a hosting provider that meets all your website’s needs.
Installing WordPress on Your Server
Once you have chosen a hosting provider and registered for a plan, it’s time to install WordPress on your server. There are two common methods of doing this: using cPanel or FTP.
Steps to install WordPress on your server using cPanel
If your hosting provider offers cPanel, installing WordPress is very easy. First, log in to your cPanel account and navigate to the “Softaculous Apps Installer” section. Here, you’ll see an option to install WordPress with just a few clicks.
The process is straightforward: select the domain name and directory where you want to install WordPress, enter your site information (such as the site name and admin username/password), and click “Install”. Softaculous will take care of everything else for you.
Steps to install WordPress on your server using FTP
If your hosting provider doesn’t offer cPanel, or if you prefer more control over the installation process, you can use FTP instead. First, download the latest version of WordPress from wordpress.org/downloads/ and unzip it on your local computer.
Next, connect to your server via FTP using an FTP client like FileZilla. Create a new directory where you want to install WordPress (such as “public_html/mywebsite”), and upload all of the unzipped files into that directory.
Navigate to your website’s URL in a web browser (such as mywebsite.com) and follow the instructions that appear on screen. You’ll need to enter some basic information about your site (such as the database name/username/password) before being able to use it.
Troubleshooting common installation issues
If you encounter any issues during the installation process, don’t panic. There are many online resources available to help you troubleshoot and resolve any issues. One common issue is the “white screen of death,” which occurs when something goes wrong during the installation process and your site appears blank.
This can be caused by a number of factors, such as incompatible plugins or themes. To address this issue, try disabling all plugins and switching to a default theme like Twenty Twenty.
If the problem persists, you may need to reinstall WordPress from scratch or contact your hosting provider for assistance. Another issue that may arise is database connection errors.
This can occur when your WordPress installation cannot connect to the database for some reason (such as incorrect login information). Check that your database credentials are correct in your wp-config.php file and that your hosting provider’s server settings allow remote connections if necessary.
Overall, with a bit of patience and troubleshooting know-how, installing WordPress on your server using cPanel or FTP is not as daunting as it may seem at first. Once you’ve successfully installed it, you’re well on your way to building a powerful self-hosted website!
Configuring Your Site Settings
After successfully installing WordPress on your server, the next step is to configure your site settings. This involves adjusting various options within the WordPress dashboard to reflect your desired website structure and functionality.
The WordPress dashboard is the control center for managing and customizing your site. It provides access to all the features and tools necessary to create a unique and functional website.
Overview of the WordPress Dashboard and Its Features
The WordPress dashboard is divided into several sections, each with its own set of features and options. The main sections include:
- Dashboard: provides an overview of your site’s activity, including recent posts, comments, and statistics.
- Posts: allows you to create new posts or manage existing ones.
- Media: provides access to all uploaded media files, including images, videos, and audio files.
- Pages: allows you to create new pages or manage existing ones.
- Comments: lets you monitor comments posted on your site.
- Appearance: contains tools for customizing the look and feel of your site through themes, widgets, menus etc.
- Plugins: allows you to add extra functionality to your website through plugins.
The Importance of Configuring Site Settings
After familiarizing yourself with the WordPress dashboard’s layout, it’s time to start configuring site settings. These settings influence how users interact with your website by establishing fundamental aspects like permalinks structure privacy settings that will be visible to users.
Permalinks Structure
Permalinks are permanent URLs that point users towards specific content on a website. Configuring permalinks is an important aspect of site management because it impacts Search engine optimization.
By default, WordPress uses a plain permalink structure that isn’t very SEO friendly. Users are encouraged to use other permalink structures available in the WordPress dashboard to improve readability and boost SEO.
Privacy Settings
The privacy settings in WordPress determine how your website content is indexed by search engines like Google, Yahoo, and Bing. In the WordPress dashboard’s “Settings” section, users can set their site visibility to public or private. If set to private, search engines cannot crawl or index your website pages.
Site Title and Tagline
Configuring a site title and tagline is essential for branding purposes. Site title appears on top of browser windows, while the tagline appears below it. A compelling tagline can help distinguish your website from others within the same niche.
Comment Settings
Inappropriate comments can ruin user experience on a website; therefore, configuring comment settings is crucial for controlling what visitors post on your site’s pages and posts. The comment settings allow you to choose whether you want visitors to post comments directly or have them approved before published.
Overall, customizing your site settings in WordPress will bring significant improvements to your online presence; however configuring them wrongly could affect user-experience adversely. Take time out for studying each setting before making changes so that you make better decisions towards creating an exceptional website that stands out from others within the same niche.
Choosing and Installing Themes and Plugins
Overview of themes and plugins
One of the most exciting aspects of self-hosting a WordPress site is the ability to fully customize its look and functionality. Themes are essentially templates that dictate the visual layout of your site, while plugins add new features or enhance existing ones. There are thousands of both available, many for free, providing endless possibilities for customization.
How to choose the right theme for your site
When it comes to choosing a theme, it’s important to consider both design and functionality. Your theme should reflect the tone and purpose of your website while being visually appealing.
It should also be responsive, meaning it will look great on all devices. Additionally, pay attention to user reviews and ratings before making a final decision.
How to install plugins for added functionality
Installing plugins in WordPress is relatively straightforward. Start by navigating to your dashboard’s “Plugins” section, where you can search for specific plugins or browse by category. Once you’ve found one you like, click “Install Now” to get started.
After installation is complete, activate the plugin for use on your site. It’s worth noting that too many plugins can slow down your site’s performance or cause conflicts with each other.
Be sure to only install those that you truly need and keep them updated regularly. With these tips in mind, finding the perfect combination of themes and plugins can take some time but is well worth it in terms of creating a unique and functional website that meets all your needs.
Customizing Your Site Design
Creating a website is not just about having a functional site with good content; it also needs to be visually appealing. Customizing your site design can help you establish your brand identity and make your site stand out from the rest. In this section, we’ll go over some basics of HTML, CSS, and PHP for customizing your site design and using page builders like Elementor or Divi for easy customization.
Basics of HTML, CSS, and PHP for Customization
HTML is the foundation of every web page. It provides the structure and content of a web page. The basic elements of HTML include headings, paragraphs, lists, links, images, forms, tables, etc. On the other hand,CSS defines how the HTML elements are displayed on screen.
With CSS you can change font sizes/colors/styles/spacing/padding/margins/borders/etc. Knowing basic CSS will help you modify visual aspects such as fonts or colors on your website.
PHP stands for Hypertext Preprocessor which helps to create dynamic websites such as eCommerce sites that require advanced functionality like shopping carts and payment systems by integrating with databases. With these three technologies combined together will enable you to customize various elements on your website such as text formatting/styles/colors/layout/backgrounds/etc.
Using Page Builders for Easy Customization
If custom coding isn’t something you want to explore too much then using page builders is a great option that allows users to visually create their own designs via drag-and-drop tools without having knowledge in coding languages like HTML/CSS/PHP or any programming languages. Elementor and Divi are two popular paid options out there that offer an array of customizable templates with intuitive interfaces which make it simple to create professional-looking websites without writing any code – saving both time and money in development costs.
customizing a WordPress site can be done using HTML, CSS, and PHP. However, for those who are not comfortable with coding they can utilize drag-and-drop tools like Elementor or Divi page builders to achieve a professional-looking site.
Remember your website is an extension of you and your brand. So customize it to represent yourself in the best way possible.
Optimizing Your Site Performance
Tips for optimizing website speed with caching plugins, image optimization, etc.
The speed of your website is crucial because it not only affects the user experience but also impacts your search engine rankings. One way to optimize your site performance is by using caching plugins. These plugins create static versions of your pages and posts, which are served to visitors faster than dynamic pages generated on the fly.
Popular caching plugins include WP Super Cache and W3 Total Cache. Another way to improve website speed is by optimizing images.
Large image files can slow down your site, so it’s important to compress them without sacrificing quality. There are many WordPress plugins available for this purpose, such as Smush Image Compression and Optimization or ShortPixel Image Optimizer.
Importance of security measures like SSL certificates
Website security is more important than ever before because cybercriminals can easily target vulnerable sites and steal sensitive information. One key security measure you should implement on your site is an SSL certificate. SSL stands for Secure Sockets Layer and creates a secure connection between a user’s browser and your server, ensuring that their data remains private.
Additionally, Google now considers SSL certificates as a ranking factor in search results. You can obtain an SSL certificate from a range of providers including Let’s Encrypt (a free option), or through your hosting provider who may offer it as part of their hosting package.
Once installed, you should configure all web pages to force HTTPS connections instead of HTTP through the use of redirects or plugin settings. Other important security measures include keeping WordPress core files updated regularly with the latest software patches and installing reputable security plugins like Wordfence Security or iThemes Security Pro which provide protection against malware attacks, hacking attempts and more.
Maintaining Your Site
The Importance of Regular Backups and Updates
Once your WordPress site is up and running smoothly, it’s important to keep it that way. One of the most critical aspects of maintaining a self-hosted WordPress site is ensuring that you have regular backups and updates in place. Regular backups help you avoid losing your data if anything goes wrong with your site, such as a security breach or a server malfunction.
In addition, regular updates help ensure that your site remains secure, up-to-date, and optimized for performance. There are several ways to backup your WordPress site, including using plugins like UpdraftPlus or backing up through cPanel.
When it comes to updates, WordPress itself as well as any themes or plugins installed on your site will require periodic updates for security and performance reasons. Keeping everything updated can be a time-consuming process but is essential for keeping your website safe and secure.
Conclusion
Self-hosting a WordPress site may seem like an intimidating process at first glance but understanding the steps can be empowering for anyone who wants to take control of their own web presence. The benefits of self-hosting include greater flexibility in customization options and the potential for cost savings over time compared to managed hosting services.
Remember that choosing the right hosting provider is key to getting started on the right foot with this process. From installing WordPress on your server to configuring settings and customizing design elements, there are many steps involved in creating a successful self-hosted website using WordPress.
Taking care with maintenance tasks such as updating software regularly and backing up data helps protect against potential issues down the road. By following these guidelines carefully, anyone can create an effective website with full control over their content management system (CMS), all while enjoying greater freedom from third-party platforms’ limitations.


It's great that you talked about how business insurance can provide financial protection against unexpected events and help ensure the…
I like that you mentioned how business insurance is essential for protecting your bottom line and the long-term viability of…